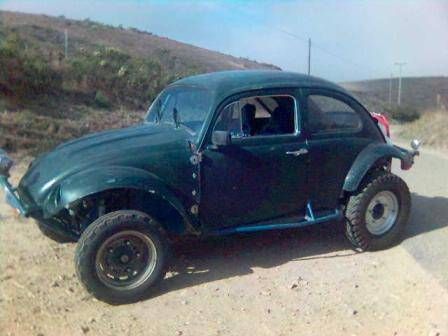
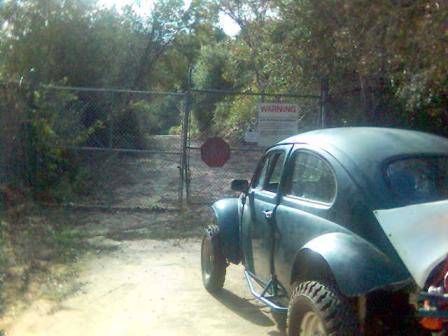
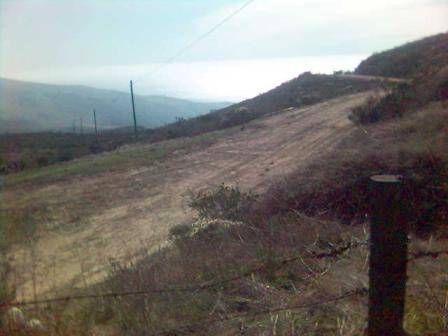
Sungreen

This Blog is for my Baja Bug 'SunGreen' that I am rebuilding. see more pics of the BAJA
Don't overlook the archive links, there is a lot that isn't shown

Thursday, December 29, 2005

It never ends

I haven't been doing a very good job of keeping this blog up-to-date, especially with all the work I have been doing to the bug, so here is all that has been done in the last month(?).
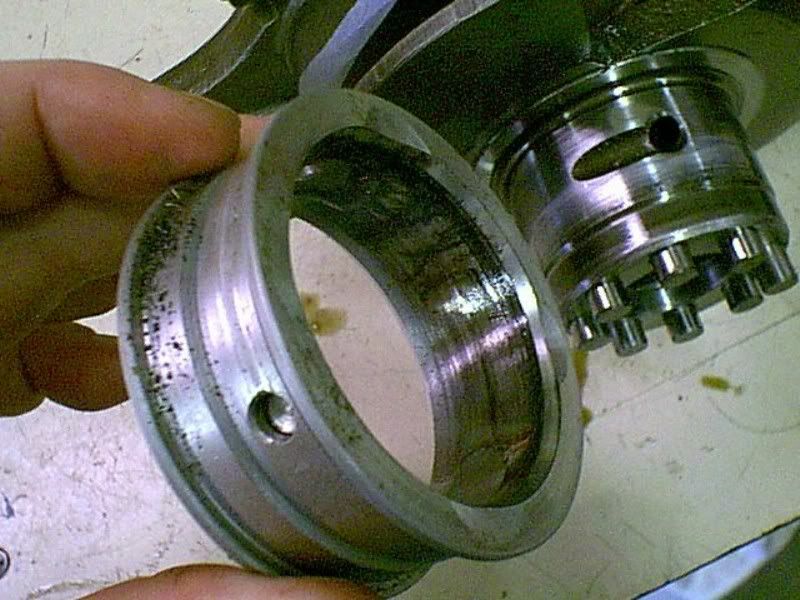
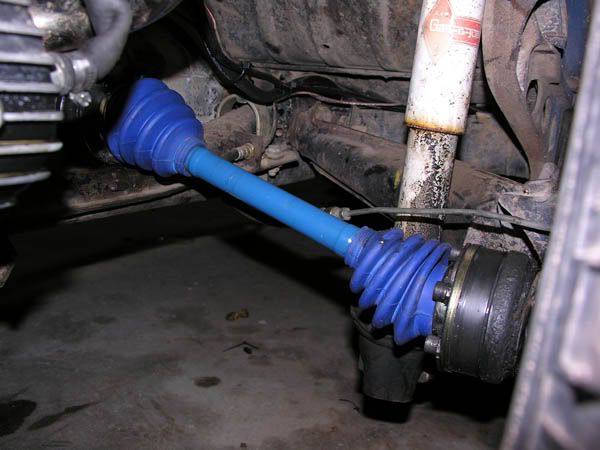
A few weeks ago I found a tear in one of my CV boots. It flung grease everywhere! When it got on the exhaust it smelled awful! and was reason alone for getting it fixed.. so I ordered new boots, but I'm not sure I was completely prepared for the greasy madness that followed. I was interested in how the CV's worked so, of course, I took them apart. They weren't horribly complicated and I was able to clean everything up pretty well. I also went to Perry's auto wrecking and picked up two more CV's for $40, a little more than I think they were worth.. I separated the badly worn from the acceptably worn parts, and after I wire wheeled and re-painted the axles, I began assembly.


I must have jinxed it with my pompous assembly, thinking it wasn't as difficult as people said it would be, because as soon as everything was coming together all the balls fell out of both of the joints. They were already on the axle and the retaining clips in, so it was a lot more difficult to put together again. But I kept my patience knowing it could be worse; there could be grease everywhere.... I spent at least half of an hour putting them back together, when it only took a minute a piece the first time. I learned that the more grease there was the better the balls would stay in... and I reached hell at last... eventually it all came together and 28oz of Molybdenum grease later the Stink Bug was ready to drive again.. It looks good but I think the new boots are crap and will have to be replaced long before they should. They are already showing whitish stretch marks.


More recently I ordered an oil temperature sender and a tachometer and put them in. They wouldn't work and after a bit of troubleshooting I discovered I had mismatched wires... so I got it all straightened out.. I feel much more comfortable while driving now..
I also bought and installed a gasoline pressure regulator for the carbs. They responded well.


The other night I found that my alternator wasn't working.. with my lights on I would lose a hundredth of a Volt per second. Meaning I had about 5 minutes of driving time at night... otherwise it would keep just under 12 volts after charging the battery. I assumed it was just bad and that I would need a new one, but I did a little research and found a wiring diagram. It turns out that the "idiot light" needs to be wired to the alt. or it won't charge. I'm still only getting 6-8 amps.. but I'm not running a stereo or my light rack so its cool for now.

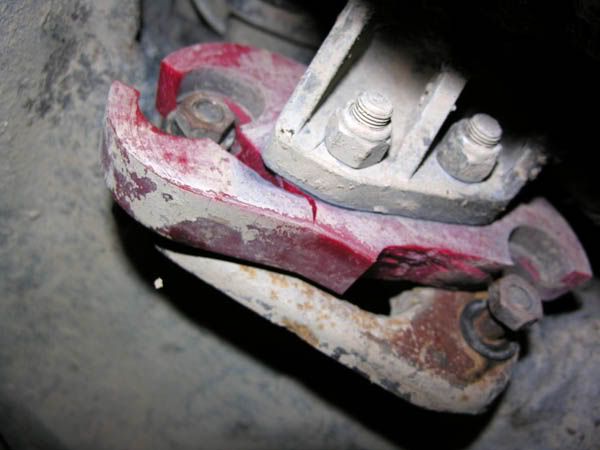
For about a week now I've was having symptoms that I couldn't figure out. I finally found that the front transaxle mount had split and no longer held the nose of the transaxle in place, all because the strap wasn't holding the transaxle down.. it put too much strain on the mount and it just cracked the urethane in half. The urethane mounts are crap. They are only a year old, but I have the old ones and won't have to wait for shipping.

Thursday, November 24, 2005

100th mile


There is nothing better to do on a beautful Thanksgiving day than to cruise the back roads and the occasional dirt path (when you can find it).
I went on google maps and found a few back roads that looked fun. I started at La Salle Canyon road which should eventually lead to the ocean, according to google. What google doesn't show are the myriad of "No Trespassing" and "VAFB Property" signs and gates on every remotely interesting backroad. So I was able to go a whole mile on paved La Salle Canyon road until I came to this. I don't think I've seen a road that wanted to be driven so desperately than the one behind that fence.


It's amazing what the Air Force base is getting away with!! They have some of the best, untouched land in the area. The base definitely has some of the best coast around!! Anyway, this is the top of Miguelito road.. this road leads to the ocean, but once again VAFB claims victory. That white low cloud area is acutally ocean and some haze.


And this is the end of Miguelito road.. another road that screams to be driven


I finally found a place to get off the pavement on Cellite property. It was a rough road and I got stuck once, but was able to lift my front end and body off the high dirt. Its amazing how much clearance I lost when I put those smaller tires up front. I'll have to switch back.
On the way home I turned over my engines first hundred miles. Time to re-torque the heads.

Saturday, November 19, 2005

IT LIVES!!!

I've been slacking on keeping this blog up-to-date, but it's not far behind.
Since the last post a lot of interesting things have happened. First I didn't have enough endplay to fit three shims behind the flywheel, and everyone agrees that it needs three shims. When I posted at TheSamba Gary from Davis Racing told me that maybe I'm not getting enough clearance because the crank isn't seating against main thrust bearing properly. He sent me a picture of a bearing from an engine with 50 miles on it. This bearing is badly worn!!


I knew he was serious when he told me to call him. He explained to me what the problem might be and I concluded that I should play it safe and check it out, meaning I would crack the case again. So I began the teardown.


When I got down to taking off the cylinder/pistons I realized that I could see the surface where the bearing and crank met by looking through the #3 bore with a flashlight. Everything was OK. whew! I reassembled.

I was left high and dry waiting for an endplay gasket for about a week in which time I did a little studying. My original plan was to run my remote oil cooler from the full-flow pump cover along with the filter, this would mean constant flow through the cooler. After learning the function of the oil-control valve, which stops flow to the stock oil cooler when the oil is cold, I decided to use the adapter I talked about in an earlier post for the oil cooler. One of the reasons that the adapter is a bad idea is that it wouldn't give constant flow to a filter. But thats one small reason among many more important ones. So now my cooler is being supplied by the adapter (where the stock oil cooler would be, and I plan on putting a stock cooler back as soon as I get the cash), and my filter is being supplied by the full-flow pump cover. so... yeah...

I got the Chromoly Pushrods in and cut them (a little harder than I expected but they turned out well)

As soon as I got the endplay gaskets in I JAMMED!!! In no time I had the flywheel on and torqued down with the proper endplay, then the clutch and then slapped the engine in the car. Then I adjusted the valves and plumbed the oil lines.

First I primed the engine (got the oil flowing) by turning it over for a little more than a minute by the starter. I did that with the plugs out. So I put the plugs in, wired up the ignition and set the timing to get it to start. I got as far as getting it to back fire, giving my friends a good scare. I was stumped why it wouldn't start. I spent half the day figuring out that I had installed the distributor drive shaft in 180° off. backward. NICE!! and I was so intent on getting it right! since the last builder had done it wrong. anyway, all I needed to do was turn the distributor around. Keep reading, there are two really good stories coming up.

You better believe I was more than ready to get this thing running! Enough to not notice (until the last second) that the ratchet I was using to turn the engine over by hand was still on the pulley nut when my friend tried to start it!! GAAA!!! the ratchet spun then flew off, the pulley nut bent and the alternator strap broke! Gladly no one was hurt! As soon as I got everything back together it was ready to run.

I stood in the back while a friend (Keith Johnson) started up, and immediately brought it up to 2500-3500 RPM. It sounded great! I set the timing to 30°BTDC. When I was trying to start it earlier I took off the air cleaners to shoot some starting fluid in the carb's I replaced the wing nuts so I wouldn't lose them. During the initial 20 minute break in, I noticed that the wing-nuts on the carb' opposite of me were going up and down the threads. I looked down on the carb' in front of me and to my dismay there were no wing-nuts there! looking into the carb' throat I see something shiny on the butterfly valve! I quickly get it out with an extension magnet and it turns out to be one of the wing-nuts!! Where on earth is the other!?!?! DID IT? COULD IT HAVE? IS IT DOWN IN MY HEAD?!?! The engine is still running fine. I turn it off only 10 minutes into break-in. I know that the wing-nut isn't IN the head, because you would hear that kind of thing, but it could be really close to going in. First I check the ground all around me, crawling on my knees. I'm petrified with fear. I put the extension magnet down the carb' manifold.. nothing.. I take a minute to sit in resignation. THERE IT IS!!! it had fallen on the ground and kicked to the corner!! UNBELIEVABLE!!! I quickly put my air cleaners back on and resumed the break-in.

After break-in I changed the oil and adjusted the valves. Then ran it for another ten minutes at 3000 RPM. Stopped it and let it cool a little. then started it up again and adjusted the idle speed. Then I adjusted the air/fuel mixture and re-adjusted the idle. It sounds really good! A few oil leaks at the brass fittings, but nothing Gaskecinch couldn't handle.

Today I fixed one of the oil leaks and replaced the belt with a new one. The little ratchet incident had left the belt a bit stretched and I didn't like it. Then I drove it to get gas (91 octane) and then found a hill to seat the rings. You seat the rings by getting the engine hot; in this case by loading the engine going up a hill a few times. I also tried another approach by getting the RPMs up in third gear then letting off the gas, to let the engine slow the car, this is also supposed to help seat the rings. So far I've got 20 miles on this engine! and it feels great! For a minute while driving down H street, I was distracted from concern for the engine by the overwhelming glee of what I had done, I couldn't have stopped smiling if I had to. It is the accomplishment of my life.

Thursday, November 03, 2005

Longblock

I got the barrel shims in the other day and began top end assembly. I washed and installed the pistons and cylinders then put on and torqued down the heads. Then I began rocker geometry.


Now setting rocker geometry takes a little bit of patience and when you just got the parts that will let you complete your rebuild, patience doesn't come freely. After being sure that I absolutely needed new pushrods I cut one and tapped it so I could adjust it to make it the right size. I don't have a dial indicator so I used my depth guage to find mid-lift of the valve. After a lot of adjusting and measuring and putting a few different variations of shims I finally felt that it was good enough. With .090" of shims my adjustable pushrod came out to an even 11.25 inches. I had to measure them by putting them up to a ruler, but I feel confident that 11 1/4 is not just a conveniently round number that I made up.


I should have ordered the pushrods before hand but I was just being stingy hoping I could reuse my old ones. I also thought I would have to have it cut on a lathe so I couldn't order it until I knew. But having no way to measure to even a tenth it's awesome that it came to an even 1/4, so I decided just to cut it myself and save $30 and the extra time it would take to get here.
Anyway. After I ordered new cromoly pushrods I put on the tin, alternator and carbs. I finished my custom carb linkage, then bolted the breather onto the back of the tin and routed the lines to it. It looks far better than before and it's out of the way. Then I mocked up the header and realized I would burn a hole in my oil line if I left the fitting facing out towards the exhaust. A trip to Ace and I had a street elbow.. oops it doesn't have enough clearance to screw on. Another trip to Ace and I had a 1.5" nipple and 90° elbow that fit. Its totally honkey-dory plumbing but it works and it won't burn my oil lines.


I bought new oil and gas lines, then new oil filters and a box of oil. Online I ordered a flywheel gasket, a new (and very expensive) SCAT gland nut, exhaust gaskets and new teal/green spark plug wires. I have no money left : (
Right now I'm stopped dead until I get the flywheel gasket, gland nut and exhaust gaskets. If I had those I could at least get as far as installing the engine in the car and finishing the oil line plumbing.
I'm still worried about torquing the gland nut. It needs 300 foot-pounds of torque. My only plan is to stand 1 foot and 10 inches out, from the center, on a cheater bar. That should be equivalent to 300 foot-pounds. It's a good plan and there is no reason that it shouldn't work but it just seems unprofessional.

Saturday, October 29, 2005

Side projects

While I'm waiting for parts I wanted to get a few things done so I put the rocker assembly on my heads, cleaned my engine tin really well (you can actually see yourself in it) and then I started a small project I've been meaning to get to; a plexiglas protection for all the open wires behind the dash.
First I made a mock-up of cardboard then spray painted it onto the plexiglas and cut it out using a Dremel with a masonry blade, it worked really well.


For now it is only mounted by one sheet metal screw but I'll do more later. You can just see the outline of the plexiglas.


Because I have a single peice fiberglass front-end, mud and water and all kinds of crap would fly right up behind the dash making a real mess! It hasn't shorted the wiring out yet but I'm sure it would eventually happen, and it's just a good idea anyway. It looks pretty good..

Friday, October 28, 2005

Short block

Last night I went back and tore down everything, so first thing this morning I went to NAPA to have the stud Healy-coiled. $35 later my case is ready to start over.
Yesterday I also went to Wessex Motors to ask if they had a distributor drive shaft shim, since I had too much clearance between the shaft and the case. He called me back today and said he had found one in a box of old VW parts and gave it to me. There were a few campters, a Karman Ghia (he said the engine was being rebuilt as a father-son project by a friend, it looked really good), and a little Porsche at Wessex. Its always interesting to see other VW.
I was confused about installing the distributor drive shaft in relation to the distributor gear on the crank and I posted at TheSamba about it and it turns out that it doesn't really matter how it goes in! I spent a good two hours figuring that one out.. but that was yesterday before the stud stripped out.
Today, after I cleaned everything out, I began assembly and it took no time at all.. I'm a pro at it now. First the distributor drive shaft, then bearings and crank, then the lifters and cam and then the other half of the case. Everything needs to be really lube'd up and one half of the case needs liquid gasket coated on since there are no case gaskets. By mid-day it was all bolted up and torqued down.
Next was to set the end-play by putting on the fly-wheel, torquing it to 200 foot-pounds and measuring the movement when you push/pull the fly-wheel. When I put all three shims on (.030 of an inch) it was so tight that there was no end-play and the crank wouldn't turn. I left only one shim (.010 of an inch) on this time but the end play was excessive. I put two shims on (.020 of an inch) and, just by eye, the end play seems good. Specifications say that it needs to be between .030-.050 of an inch so I will need to measure how much end play I actually have with a dial-indicator and then add what ever shims I need, meaning I had to order a set of shims.
Next I put the pulley on, then the oil strainer and plate, then the oil pump and the new pump cover made for 'full flow'. It's coming together!
I need to set the deck height by mocking up the piston and cylinder and seeing how much I have so I can add the appropriate shims. I expected that I would have the correct deck height with the shims I was given, but when I mocked it up the piston was flush with the cylinder top meaning I had no deck height. I need a .040 shim under all the cylinders to get the right deck height. A .040" deck height and 53ccs of volume in my heads will give me a compression ratio of 9 to 1. I will need to order the shims so it looks like I have the weekend off.
here is all that I've gotten done today..


Thursday, October 27, 2005

Two steps forward... Ten steps back

Bam! crank in.. Bam! cam in.. Bam! distributor drive gear, lifters, all the bearings and other half of case in!!! Bam! torque all the nuts.. oh... wait a second... one doesn't want to tighten up... oh... wait a second... now the stud feels loose... oh wait a second... I'm pulling the stud out and I see that it stripped the threads on the inside of the case!!!

All I can do is strip down again. Everything comes out of the left side of the case: cam, crank, distributor drive shaft, bearings, and lifters... pretty much everything I spent today putting in... I'll have to drill and tap the case, then I'm back to cleaning it and finally assembling it all together again tomorrow, if I get that far..